
Decision-ready outputs
Reports & Evidence Sharing
Generate role-appropriate reports, decision PDFs and evidence packs, then share selected evidence externally without granting broad application access.
Requires report-view/generate permissions; external evidence portals require export_reports
Reports preserve meaning
InspectAssets reporting keeps condition, inspection coverage, uncertainty and evidence distinct. Use the report type that matches the decision being made; do not substitute an unrelated page printout for an inspection, decision or audit record.
My Reports vs Report Management
The report area is role-aware. An inspector may see My Reports and be limited to their own inspections. Managers/admins with broader report capability see Report Management and can filter across allowed sites, inspectors and date ranges.
This is intentional data scoping. If an inspector cannot select another inspector, that is not a missing filter; it reflects the permission model.
Filtering reports
Use site, inspector and date filters to define the report population before exporting. Review the on-screen rows first: inspection status and coverage are useful checks that the right records have been selected.
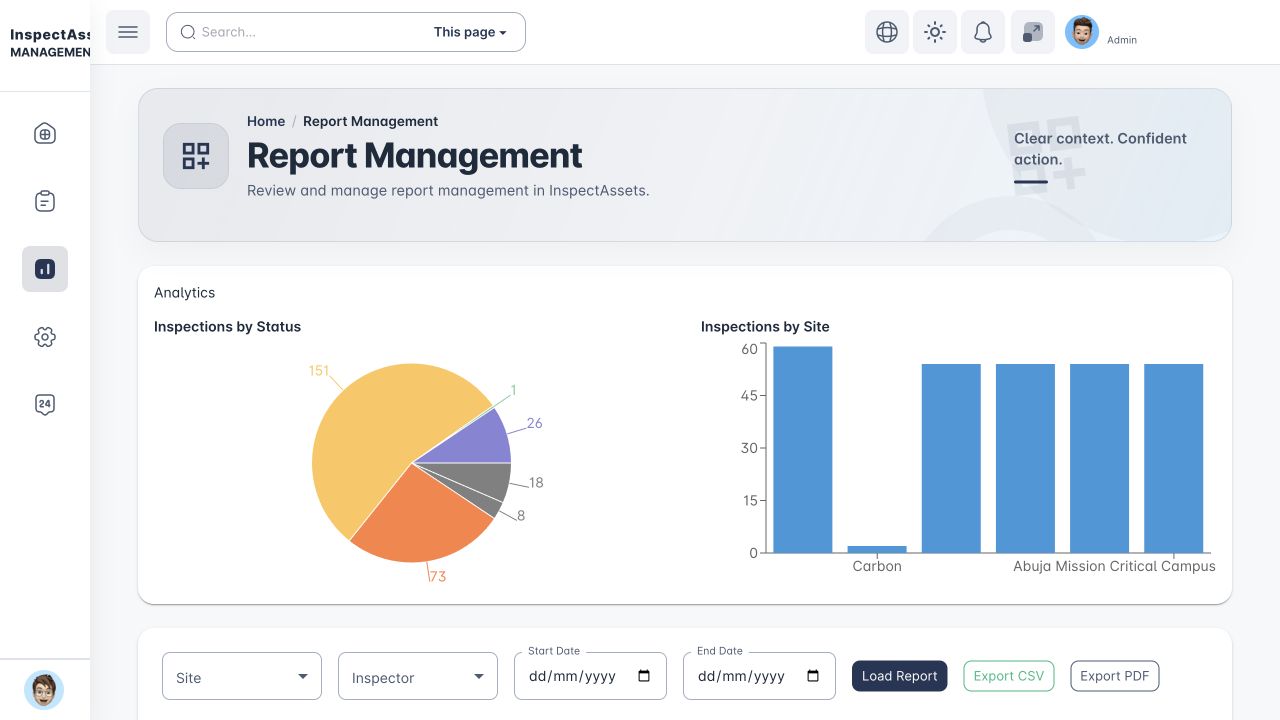
Generate and check a report
- Open My Reports or Report Management according to your access.
- Choose the supported site, inspector and date filters, then select Load Report.
- Check the returned site/asset/inspection identity, status and coverage. Empty or differently scoped results need investigation before export.
- Choose the required output below. Export/portal actions and tenant plan entitlement are checked separately from opening the report page.
- Open the downloaded file and check the identity, scope, pagination and evidence before sharing it.
Export the intended records and confirm the output
Before you start: you need access to the report's records, export_reports for export controls and the applicable plan entitlement. Confirm the correct tenant, site and legal entity, and that you are authorised to share the selected records.
- Open the report workspace, set its site, inspector and date filters, and select Load Report. Check that the displayed rows match the intended population.
- Use Export CSV for structured data or Export PDF for the loaded report. Use the row's Decision PDF for one inspection. These outputs have different purposes.
- For site-scoped packs, select a site first. Then choose Export Audit Pack, Export Evidence Pack (ZIP) or the advanced ZIP option as required.
- Wait for the browser download. Open the actual downloaded file, not a previously saved report. For a ZIP, inspect its contents and open representative evidence files.
- Check the site/asset/inspection identity, dates, coverage and uncertainty. Review PDF pagination and ensure the intended evidence is included. Share only through an approved channel.
Done when: the downloaded file opens successfully and contains the intended records and evidence. A click, spinner or empty browser window is not proof of export completion.
Next owner: the report recipient reviews the evidence in its stated scope. If they need controlled ongoing access, use the external review-link workflow.
If blocked: check the download list and browser download restrictions. Missing controls can reflect permissions, plan entitlement or an unselected site. An empty result needs a filter/scope check; do not broaden permissions merely to obtain more rows. Report failed or incorrect output with its type, record reference and error message, without uploading confidential evidence to an unrelated support channel.
Available report outputs
| Output | Best used for | Important content expectation |
|---|---|---|
| CSV | Structured analysis/reconciliation. | Machine-readable inspection/report fields for the selected scope. |
| Decision PDF | A management-ready record for one inspection. | The correct inspection, condition, coverage/uncertainty and decision-relevant evidence. |
| Export Audit Pack | A site-level audit/review package. | Site-scoped records rather than an unrelated generic report. |
| Export Evidence Pack (ZIP) | Collecting supporting files/evidence for the selected inspection scope. | Evidence linked to the intended records. |
| Export Evidence Pack (Advanced ZIP) | More complete assurance/export scenarios. | Additional evidence options, including raw evidence where the feature/permission permits it. |
Coverage in reports
Report rows can show inspection coverage and a coverage summary. Use this when choosing what to distribute. A completed inspection with partial coverage may still be valid, but the recipient should not mistake it for a fully assessed scope.
Team Report
Team Report is intended for authorised management users. Select the manager, supervisor or team lead through the available user controls; do not rely on copied internal IDs. Inspectors should generally use their own report view rather than the team-wide report.
External Auditor / Client Evidence Portal
Users with export_reports can create a read-only, time-limited evidence link for an auditor or client. This is safer and more precise than creating a normal application user solely to review a small evidence set.
Give the portal a title, auditor/client label and purpose so the external context is clear.
Choose the assets, inspections and permitted evidence rather than exposing the whole tenant.
Use a limited validity period and decide whether file downloads should be allowed.
Copy the generated bearer-token URL when it is created. The readable token is not retained for later recovery.
Use the issued-links table and access log to review accesses/downloads or revoke the portal before its natural expiry.
What the access log records
Where available, the access log records when the external portal was used, the event/file involved and request context such as IP. This creates a better audit story than emailing uncontrolled attachments.
Issue and retire an external evidence review link
Before you start: use an authorised account with export_reports. Agree the recipient, permitted evidence and review end date. The recipient will receive a bearer credential, not a general application account.
- Open External Evidence Portals. Enter Portal title, Auditor / client label and Purpose / review context.
- Set Expires. Choose only the Authorised assets, Authorised inspections and evidence categories required for this review. Decide whether Allow downloads should be enabled.
- Select Create secure portal link. Copy the newly displayed URL while it is available, then deliver it securely to the intended recipient.
- Confirm the entry under Issued portal links, including its status and expiry. Check the access log when needed. Ask the recipient to report missing or unexpected records rather than granting a broader link by default.
- When the review ends or the URL is exposed, select Revoke. Check the updated status. A lost readable URL requires a new scoped link and revocation of the old one.
Done when: the intended recipient has the scoped link, its issuance is recorded, and it is expired/revoked when no longer needed. Link creation does not prove the recipient has read or accepted the evidence.
Next owner: the issuer monitors expiry and access; the recipient reviews only the selected evidence. Do not place active URLs in support tickets, screenshots or training material.
Treat the portal URL as a credential
Anyone with an active bearer link may be able to access the evidence selected for that portal. Send it through an approved channel, keep the scope narrow, set an expiry, and revoke it if the review ends early or the link is exposed.
PDF and export quality checks
- Confirm you generated the intended report type and not an earlier/unrelated report.
- Check the site/asset/inspection identity and date range.
- Verify role access and that restricted evidence was not unintentionally included.
- Review pagination, blank pages and whether application navigation/chrome leaked into the output.
- Keep historical, decision, inspection and evidence-pack outputs distinct; they serve different purposes.